Solving the School Snack Situation

Do you ever struggle to come up with healthy items to pack in your kids’ snacks and lunches that they’ll actually eat? I try my best to keep my kids away from processed foods and excess sugar, but when they’re seeing it in all the other kids’ lunch boxes, it can be tough!  My kids are pretty healthy, and understand the importance of choosing quality foods to fuel them through the day, but they also like to have things in their lunch boxes that seem like a treat.  So, my job becomes finding them something high in protein, low in sugar, and ALSO yummy (I know…does that even exist??) to pack for their morning recess snack.

My solution?

No Bake Protein Energy Bites!

design

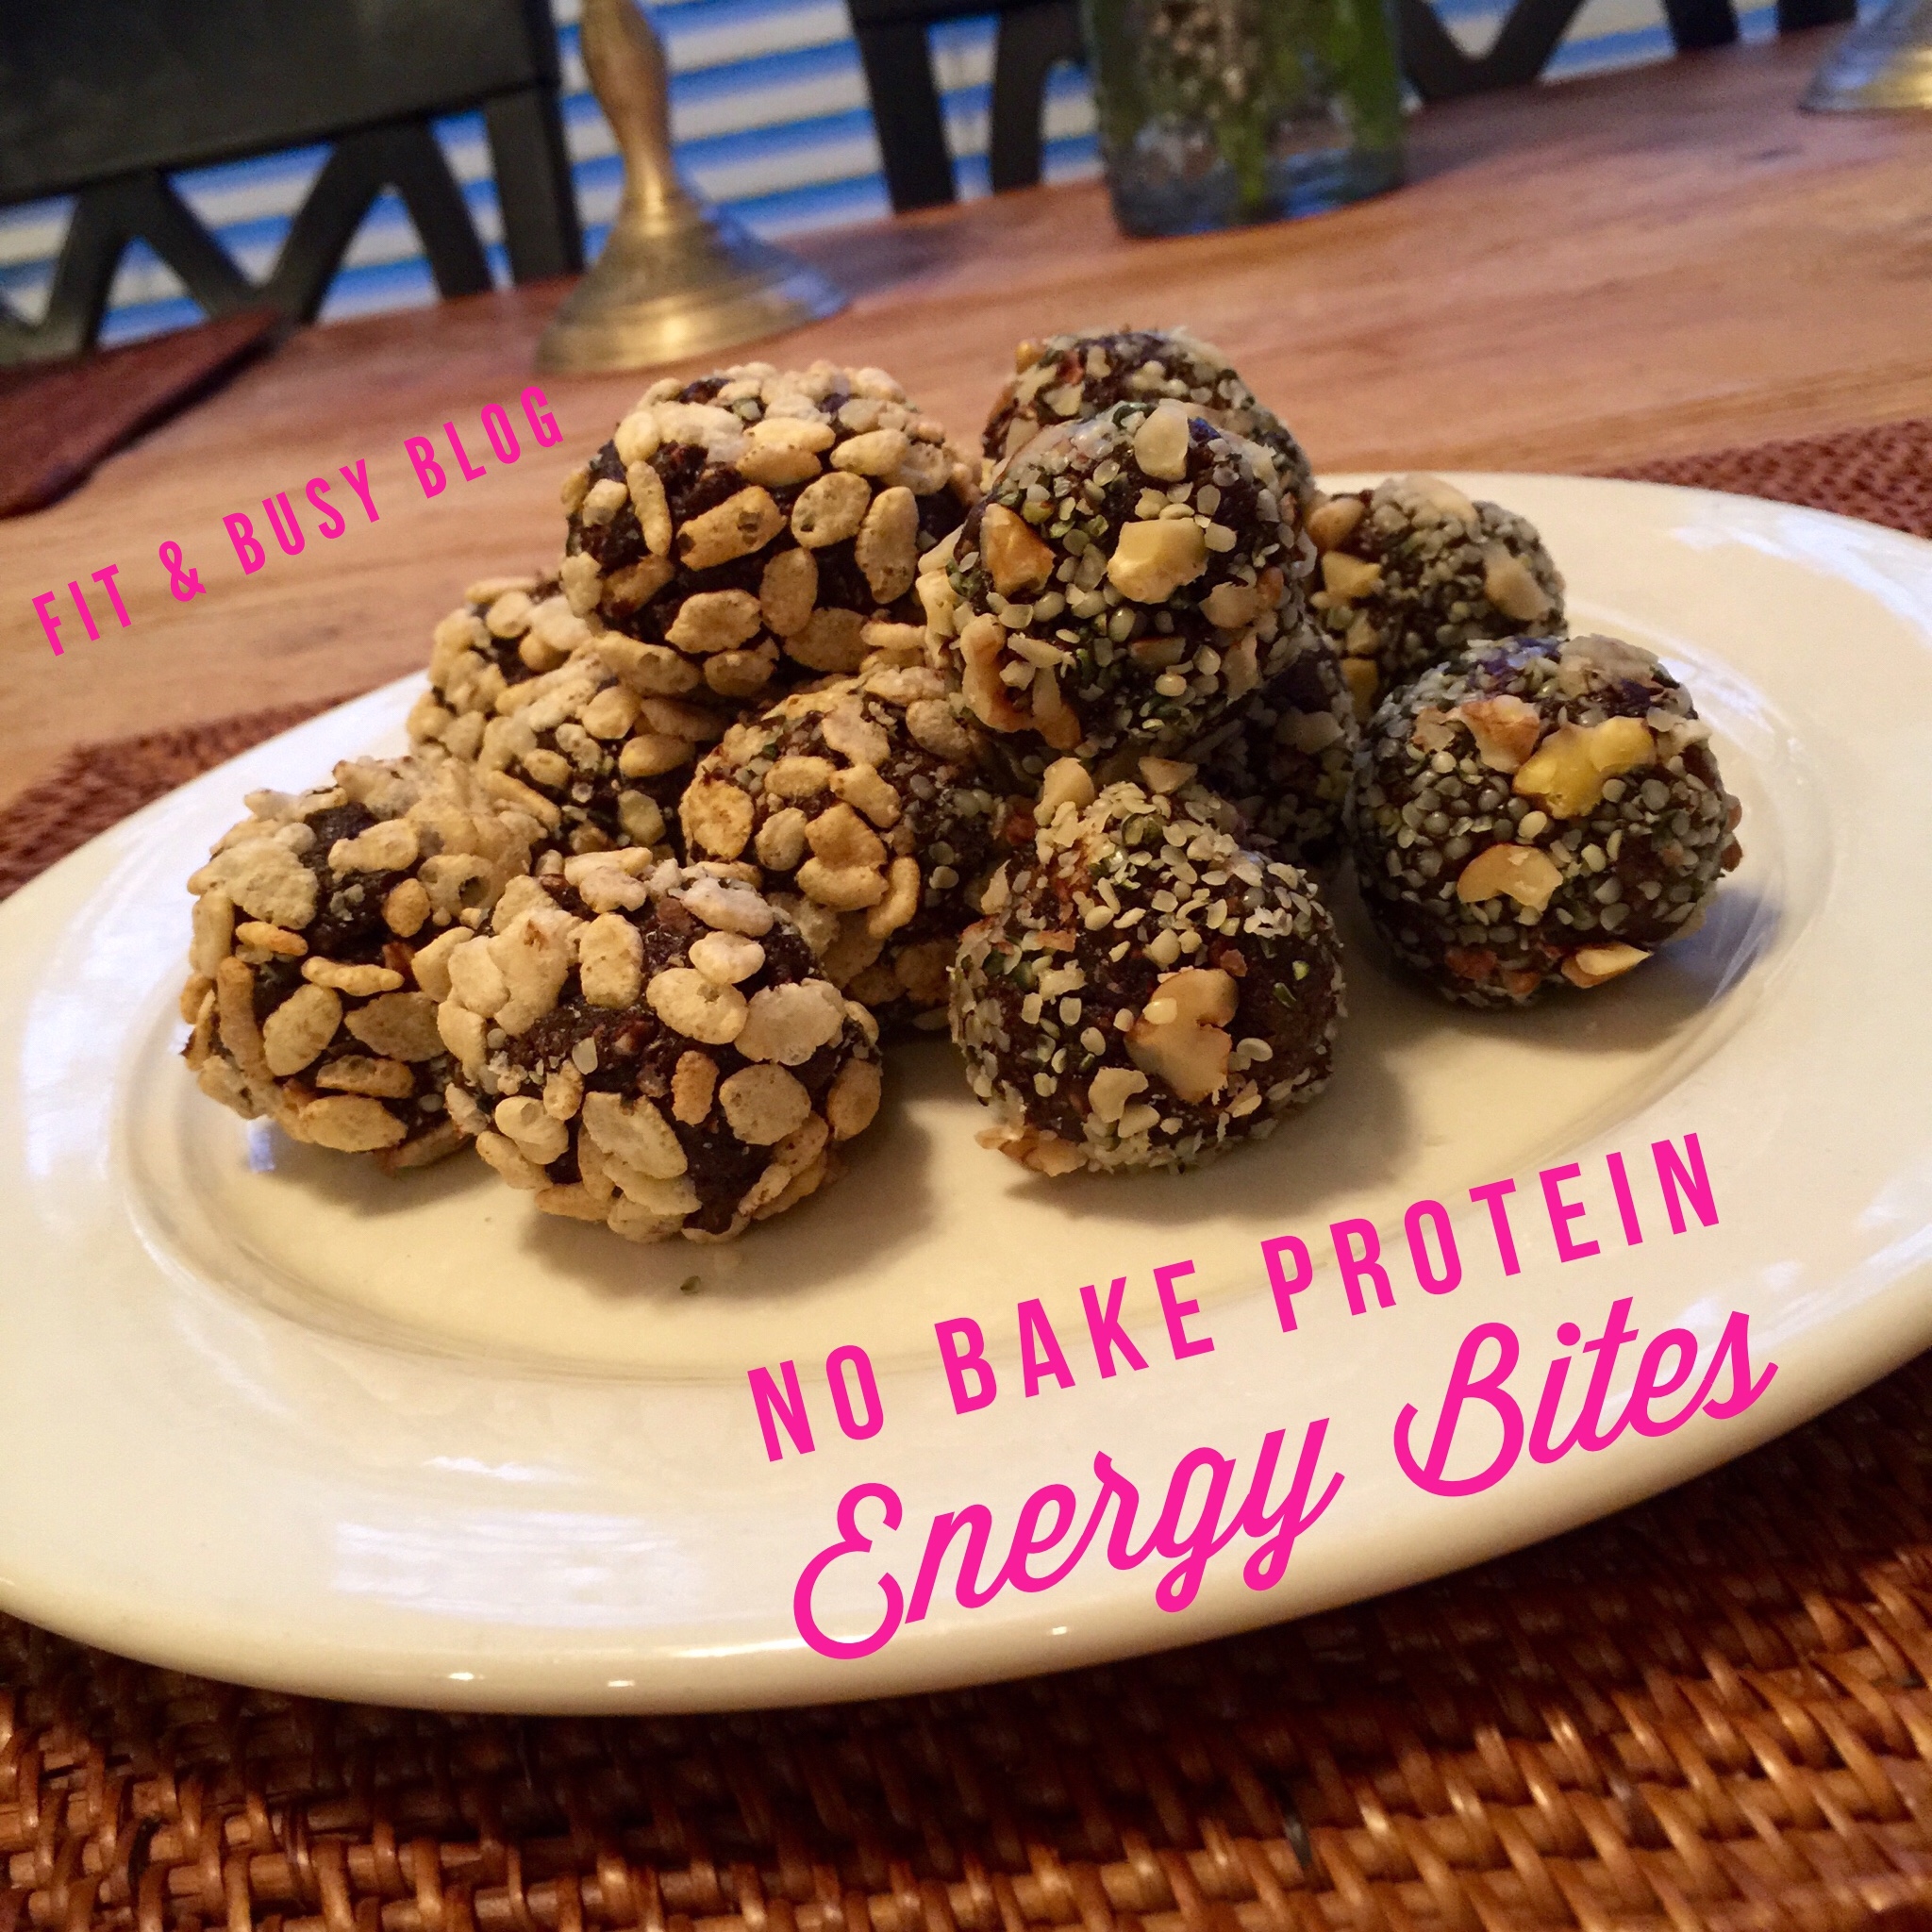
This recipe is so simple to make, and creates a bite sized “treat” that is perfect to pack for school, offer as an after school snack, or even as an after dinner treat!  My kids love taking them to school for their morning recess snack time, and I love knowing that their snack is filled with protein and other healthy ingredients, will give them lasting energy without a blood sugar crash in the middle of class!

Ingredients:*
– 2 scoops chocolate protein powder (I used Shakeology for the added healthy ingredients, but any good quality protein powder would work!)
– 1/3c organic peanut butter
– 1/4c raw organic honey
– 2 Tbsp. PB2 or other powdered peanut butter (optional)
– 1/2c quick cooking oats (I used rolled oats and put them in my magic bullet to make them a little more fine)
– 1/2c applesauce
Optional ingredients for rolling:
– Chopped nuts (walnuts, almonds…whatever you have on hand!)
– Hemp seeds
– Puffed rice cereal

The Method:
1. Thoroughly mix all ingredients together in a mixing bowl.  The mixture should be VERY thick and sticky.  It needs to hold together completely, and should not stick to the sides of the bowl.
2. Once it is completely combined, and you’ve reached the desired consistency, roll into one inch balls and place on a tray or baking sheet.
3. At this point, I prefer to roll them in something to coat the outside of the ball, but this step is optional.  I find that coating the outside helps keep them a little less sticky by the time the kids eat them for snack.  For my most recent batch, I rolled 1/2 in puffed rice cereal and the other 1/2 in a combination of chopped walnuts and hemp seeds (for extra protein!)
4. Place tray in the freezer for 1 hour to allow them to harden separately.
5. Place frozen protein balls in a ziplock bag and store in the freezer until ready to pack or eat.  They should be frozen when you pack them in order to prevent them from getting too sticky.  They are also delicious eaten right from the freezer!

*I’m not big on measuring, so all measurements are approximate. For this recipe in particular, you really need to adjust as you go to ensure the right consistency, so feel free to play around with it. I’ve adapted this recipe from several similar recipes I’ve tried, and make it slightly different every time!

Bone Broth is the New Black

BoneBroth

Have you tried bone broth yet? I’ve been riding this latest health food bandwagon I’m loving it!! I just finished my latest batch of this liquid gold and had to share some of the awesome health benefits with you, because when you discover something awesome, you just can’t keep it to yourself!

I know, I know…it sounds kinda gross, right?  I promise, it’s not!  Just imagine your favorite chicken soup broth, only richer, more delicious, and LOADED with healthy nutrients.  Are you intrigued yet?  Keep reading to learn what it is, why we should drink it, and how to make it!

What is bone broth? Bone Broth is basically chicken or beef stock that has been cooked VERY slowly for at least 24 hours (more for beef broth) in order to pull the beneficial minerals and nutrients out of the bones.  It is rich in nutrients, and, although bone broth has been around for centuries, has recently become mainstream in for it’s long list of health benefits.

Why should we drink it? Bone broth has a LONG list of health benefits that I’ve quickly summarized for you.
1) Minerals – Unfortunately, most of us are not getting enough minerals in our diets, and mineral supplements are never as good as those naturally derived from food sources.  Bone broth is rich in calcium, magnesium, potassium and more.  These can help with everything from quality sleep to overall mood and energy.
2) Immune boosting – The nutrients in bone broth naturally boost your immune system, and can help speed recovery when you are sick.
3) Healthy joints – Bone broth contains glucosamine & condriotin, as well as collagen and gelatin that all provide support for the bones and joints.  They can also help to reduce inflammation throughout the body.
4) Digestion – The collagen and gelatin help to soothe the digestive tract, and can even help to repair some digestive issues.
5) Bone broth makes you beautiful!  No, really, it has a long list of beauty benefits, such as shiny hair, glowing skin, improved elasticity and fewer wrinkles.  This is due to the collagen and hydrating minerals present in the broth.  I mean, people pay big bucks for collagen treatments, and bone broth does this from the inside out!

How do we make it? Although it takes a long time, making bone broth is actually very easy!  There are tons of recipes online, but I’ve outlined my basic recipe for chicken below:
1) Use two ORGANIC (preferably grass fed) chicken carcasses to two gallons of water in a stock pot. Some people like to add 2 chicken feet as well (for the extra gelatin and collagen).  I know, kind of eww, right?  I couldn’t do it at first either, but I worked my way up to it 😉
2) Add 1-2 tablespoons of apple cider vinegar to the water, and let it sit for 15 minutes.
3) Roughly chop 1 onion, 2 carrots and 2 celery stalks and add to the pot.  I like to add a small amount of sea salt and cracked black pepper at this point as well, but that is optional.
4) Turn the heat on as LOW as it will go, cover your pot, and allow to simmer for at least 22-23 hours.  It should barely simmer.  You don’t want to cook it too fast!
5) After the 23 hours have passed, add in some parsley, thyme and a couple cloves of garlic.  I also like to add a bit more salt and pepper during this last hour.
6) After 24 hours, strain the liquid into mason jars and store in the fridge or freezer until you’re ready to drink it!  If you plan to freeze, only fill the jars 3/4 full, and cool completely in the fridge before freezing.

Are you ready to try this powerhouse health food?  My husband and I have both been drinking small mugs of broth each morning, and I am really loving it!  Give it a try and let me know how it goes. Cheers!

xoxo,
Malea

Healthy Scampi

Don’t you just love meals that are simple, clean & delicious?? This meal took no more than 20 minutes to put together, and was a super healthy crowd pleaser at the Anderson dinner table.  I don’t know about you, but dinner time can be a busy time for us, and having a stockpile of healthy, quick dinner ideas is the key to making sure we stay on track with our healthy eating.

healthy scampi

The method:
1. Spiralize 2-4 organic zucchini. I LOVE my spiralizer!  It turns pretty much any vegetable into these adorable noodles. It is a relatively inexpensive tool that I got on Amazon, and we use it ALL the time.
2. Sauté wild caught shrimp in lemon juice, coconut oil and garlic until cooked through.
3. Remove shrimp from pan and add zucchini noodles to pan with leftover sauce. Add a bit more lemon juice, coconut oil, garlic season with a bit of sea salt or pink himalayan salt and black pepper. Add red pepper flakes & grape tomatoes (optional). 3. Toss zucchini in sauce and cook until just tender.
4. Top with cooked shrimp and VOILA…dinner is served! How easy is that??

Eating clean doesn’t have to be boring or take a ton of time. Be sure to download my free Fit & Busy Guide to Eating Clean on the Go for some great ideas on how to eat clean when your always on the go…like me! Let’s be fit & busy together!

Xoxo,
Malea

Superfood Salad

 2014-02-05 12.48.22


Are you always on the lookout for nutrient dense and calorie light lunch ideas?  I know I am, and, in addition to it being light and healthy, I also want it to be quick and convenient.  That’s not too much to ask from a lunch, is it?  Anyway, I love when I come up with new ideas to add to my lunch rotation, and what’s the fun of having a great new idea if you can’t share it with your fit friends??


Ingredients:
¼ C of uncooked quinoa
½ bag of Trader Joe’s “Cruciferous Crunch” salad mix (I’ve heard that they have a similar mixture of kale, Brussels sprouts, broccoli, and green & red cabbage at Costco and Vons as well)
½ lemon
1tsp Dijon mustard
1tsp extra virgin olive oil
1tbsp dried cranberries
1tbsp slivered almonds
Optional toppings:
Goat cheese crumbles
Sliced cooked chicken breast

1. Prepare quinoa with ½C water according to package instructions
2. In a small bowl, whisk together lemon juice, Dijon, olive oil and salt and pepper to taste
3. Pour salad mixture into a medium skillet over med-high heat, pour lemon dressing over the top, and toss together for about 2 minutes, or until the mixture is coated and just begins to wilt.  The kale should turn a bright shade of green.
4.  Turn off the heat, and add in your cooked quinoa, dried cranberries, and slivered almonds.  Toss until combined.
5.  Place in a bowl, top with optional toppings if desired


This salad is light, fresh, and FULL of fiber and nutrients.  It also takes no more than 10 minutes to prepare.  Now THAT is my kind of lunch!  Enjoy!
xoxo,
Malea